[Serverless] OpenWhisk
OpenWhisk 是由 IBM 开源的一个 FaaS 计算平台,在2016年贡献给了开源社区,2019年正式成为 Apache 基金会的顶级项目。
OpenWhisk 本身是一个事件驱动 (Event driven architecture) 的 FaaS (Function as a Service) 计算平台,用户只需要关注业务代码的逻辑,将操作代码发送给 OpenWhisk ,并提供所需的数据流,OpenWhisk 就能自动的对计算资源进行扩展。开发者无需关心相关的基础设施架构,虽说理论上有效的提高了开发效率,可以使开发人员可以将精力放在代码逻辑上,不过 Serverless 平台的开发体验还是颇受诟病的,由于无法接触到实际的运行环境,不管是开发还是 debug 都比较不方便,只通过 log 方式调试错误。
准备工作
试水 OpenWhisk ,你可以直接试试 IBM Bluemix, 这是 IBM 公司提供的一个 FaaS 服务,参考这篇文章。
或者你也可以在本地自己构建一个 OpenWhisk 的平台,由于官方提供了完善的部署方案,所以现在你只需要:
Ubuntu (其他发行版也是可以的)
Git
依赖
比较棒的是,官方提供了脚本解决所有依赖的问题
1 | # Install git if it is not installed |
数据库
这里需要一个 NoSQL 数据来支撑 OpenWhisk 的数据持久化、用户鉴权认证等能力,就决定是你了—— CouchDB.
1 | # 校验 |
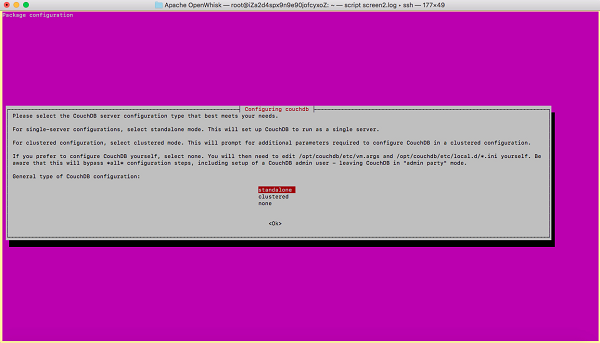
此时会看到下图,选择单节点 standalone:

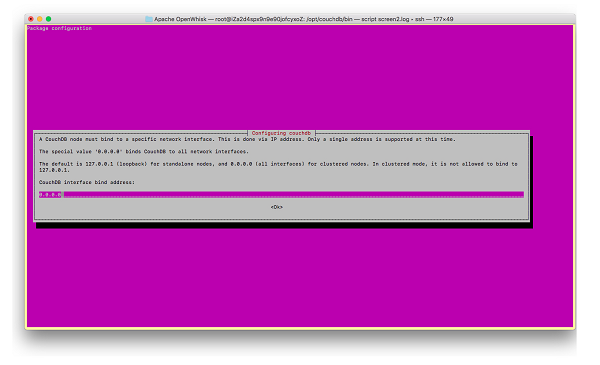
绑定 IP 0.0.0.0 :

接下来设置并确认用户 admin 的密码,就不放图了。
安装完成后,可以使用 $ sudo service couchdb status 查看 couchdb 的运行状态:

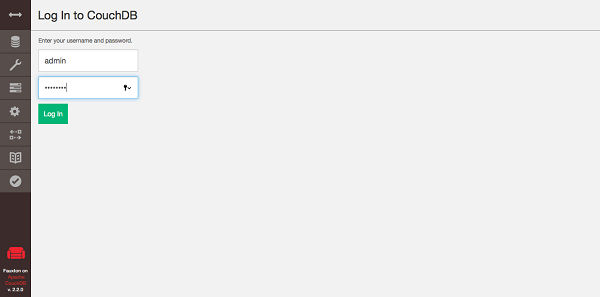
也可以试着访问 http://127.0.0.1:5984/_utils/ ,可以看到 CouchDB 的管理界面。

当然也可以直接使用 REST API 来对数据库进行操作:
1 | $ curl http://admin:password@127.0.0.1:5984/_all_dbs |
安装 OpenWhisk
之前已经将 OpenWhisk 的仓库拉取下来了,现在请先回到 $ cd openwhisk 的目录下,OpenWhisk 还提供了 ansible 工具,极大简化了安装的过程。
首先请先确保一下端口没有被占用:
80,443,9000,9001, and9090for the API Gateway6379for Redis2181for Zookeeper5984for CouchDB8085,9333for OpenWhisk’s Invoker8888,9222for OpenWhisk’s Controller9092for Kafka8001for Kafka Topics UI注意:
所有涉及 Ansible 的操作都需要在
ansible路径下执行,这是由于ansible/ansible.cfg中包含了所有的通用设定。
切换到 ansible 路径
1
$ cd ansible
设置数据库的环境变量
1
2
3
4
5$ export OW_DB_PROTOCOL=http
$ export OW_DB_HOST=<public IP>
$ export OW_DB_PORT=5984
$ export OW_DB_USERNAME=admin
$ export OW_DB_PASSWORD=password注:
<public IP>填写本机 IP,可以用ip a查看password填写之前设置的数据库密码生成初始配置,这一步在开发环境中必须先执行,它会根据你的环境生成一个
hosts配置文件1
$ ansible-playbook setup.yml
如果需要,可以在配置文件中加入多个节点的信息,在使用 Ansible 时加入
-e mode=HA的选项启用高可用,在多个服务器中配置多个 Kafka, invokers 的实例。这一步有问题,可以尝试 (后同):
1
$ ansible-playbook -i environments/local setup.yml
在所有 openwhisk 节点上安装环境依赖 (其实在单节点的配置中,这一步可以不做,所有依赖都已经装上了)
1
$ ansible-playbook prereq.yml
1
2
3
4
5
6
7
8
9
10
11
12Gathering Facts ------------------------ 0.78s
prereq : install docker for python ----- 0.66s
prereq : install requests -------------- 0.64s
prereq : install httplib2 -------------- 0.64s
Gathering Facts ------------------------ 0.55s
Gathering Facts ------------------------ 0.55s
Gathering Facts ------------------------ 0.55s
prereq : check for pip ----------------- 0.44s
prereq : install pip ------------------- 0.03s
prereq : remove docker ----------------- 0.03s
prereq : remove requests --------------- 0.03s
prereq : remove httplib2 --------------- 0.02s构建 docker 镜像
1
2
3
4
5# 切换到 openwhisk 目录
$ cd ..
# 构建镜像
$ ./gradlew distDocker部署安装
1
2
3
4
5
6$ cd ./ansible
$ ansible-playbook initdb.yml
$ ansible-playbook wipe.yml
$ ansible-playbook openwhisk.yml
$ ansible-playbook postdeploy.yml注:
initdb.yml在每次新部署并初始化 CounchDB 时都需要运行一次wipe.yml每次部署前需要运行一次$ ansible-playbook openwhisk.yml避免在重启后数据库数据丢失,这一步会拉取很多镜像,花的时间很长,耐心等待同样的用法使用
apigateway.yml和routermgmt.yml启用 API 网关安装完成后,可以使用
docker ps -a查看所有容器的运行状态:1
2
3
4
5
6
7
8
9CONTAINER ID IMAGE COMMAND CREATED STATUS PORTS NAMES
73c17753ad74 nginx:1.13 "nginx -g 'daemon of…" 2 minutes ago Up 2 minutes 0.0.0.0:80->80/tcp, 0.0.0.0:443->443/tcp, 0.0.0.0:8443->8443/tcp nginx
b51d882d6295 openwhisk/nodejs6action:latest "/bin/sh -c 'node --…" 2 minutes ago Up 2 minutes wsk00_4_prewarm_nodejs6
cb6d90d7fce5 openwhisk/nodejs6action:latest "/bin/sh -c 'node --…" 2 minutes ago Up 2 minutes wsk00_2_prewarm_nodejs6
e83e0a8ff8a3 whisk/invoker:latest "/bin/sh -c 'exec /i…" 2 minutes ago Up 2 minutes 0.0.0.0:17000->17000/tcp, 0.0.0.0:18000->18000/tcp, 0.0.0.0:12001->8080/tcp invoker0
3f1287e56e07 whisk/controller:latest "/bin/sh -c 'exec /i…" 10 minutes ago Up 10 minutes 0.0.0.0:15000->15000/tcp, 0.0.0.0:16000->16000/tcp, 0.0.0.0:8000->2551/tcp, 0.0.0.0:10001->8080/tcp controller0
e4f4b8a35182 wurstmeister/kafka:0.11.0.1 "start-kafka.sh" 10 minutes ago Up 10 minutes 0.0.0.0:9072->9072/tcp, 0.0.0.0:9093->9093/tcp kafka0
db10c72113e4 zookeeper:3.4 "/docker-entrypoint.…" 10 minutes ago Up 10 minutes 0.0.0.0:2181->2181/tcp, 0.0.0.0:2888->2888/tcp, 0.0.0.0:3888->3888/tcp zookeeper0
71df5847d252 redis:3.2 "docker-entrypoint.s…" 22 minutes ago Up 22 minutes 0.0.0.0:6379->6379/tcp redis将二进制文件加入到
PATH中1
2$ cd ../bin
$ export PATH=$PATH:$PWD安装完成
1
2
3
4
5
6
7
8
9
10
11
12
13
14
15
16
17
18
19
20
21
22
23
24
25
26
27
28
29
30
31
32
33
34
35
36$ wsk
____ ___ _ _ _ _ _
/\ \ / _ \ _ __ ___ _ __ | | | | |__ (_)___| | __
/\ /__\ \ | | | | '_ \ / _ \ '_ \| | | | '_ \| / __| |/ /
/ \____ \ / | |_| | |_) | __/ | | | |/\| | | | | \__ \ <
\ \ / \/ \___/| .__/ \___|_| |_|__/\__|_| |_|_|___/_|\_\
\___\/ tm |_|
Usage:
wsk [command]
Available Commands:
action work with actions
activation work with activations
package work with packages
rule work with rules
trigger work with triggers
sdk work with the sdk
property work with whisk properties
namespace work with namespaces
list list entities in the current namespace
api work with APIs
project The OpenWhisk Project Management Tool
Flags:
--apihost HOST whisk API HOST
--apiversion VERSION whisk API VERSION
-u, --auth KEY authorization KEY
--cert string client cert
-d, --debug debug level output
-h, --help help for wsk
-i, --insecure bypass certificate checking
--key string client key
-v, --verbose verbose output可以看到
wsk命令的相关说明。
Demo
设置 API host,在单机配置中的 IP 应该为 172.17.0.1。
1 | $ wsk property set –apihost 172.17.0.1 |
设置 key (注意在 openwhisk 路径下执行)
1 | $ wsk property set --auth `cat ansible/files/auth.guest` |
创建一个测试文件 hello.js
1 | $ sudo nano hello.js |
简单的demo,复制以下代码
1 | /** |
创建 action
1 | $ wsk -i action create hello hello.js |
通过 wsk 命令调用上面的 action ,加入 -i 可以禁用认证服务
1 | $ wsk -i action invoke hello --result |
参考
- https://github.com/apache/openwhisk/tree/master/ansible
- https://github.com/apache/openwhisk/blob/master/tools/ubuntu-setup/README.md
- https://github.com/apache/openwhisk/blob/master/docs/cli.md
- https://www.ibm.com/developerworks/cn/cloud/library/cl-lo-local-deployment-and-application-of-openwhisk/index.html
- https://medium.com/@Alibaba_Cloud/how-to-set-up-apache-openwhisk-on-ubuntu-18-04-part-ii-eb428f36177b